Part 2: Gyroscope Navigation, Street View Integration, and the Final Demo

Recap: Where We Left Off
In Part 1, we built a pedometer that uses the smartphone’s accelerometer to detect walking-in-place motion. Each detected step can advance the user through a virtual environment. The implementation handles noise filtering, threshold-based detection tuned for exercise-level movement, and delay logic that respects natural walking rhythm.
But walking forward is only half the experience. Real sightseeing involves turning corners, looking around, and choosing which direction to go. For that, we need a completely different sensor — the gyroscope — and we need to connect everything to Google Street View for the visual experience.
This second part covers all of it: gyroscope-based rotation detection, Street View integration, screen casting to TV, and the final working demo.
Implementing Rotation Detection with the Gyroscope
A. Understanding 3-Axis Rotation Data
While the accelerometer measures linear acceleration (movement along straight lines), the gyroscope measures angular velocity — how fast the device is rotating around each of its three axes.
The three rotation axes are:
X-axis rotation — tilting the phone forward and backward (like nodding your head):
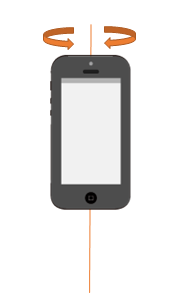
Y-axis rotation — rotating the phone left and right while held vertically (like shaking your head “no”):
Z-axis rotation — spinning the phone flat on a table (like a compass needle):

For virtual sightseeing, the most relevant axis is the Y-axis. When you hold your smartphone upright and rotate your body to look left or right, the phone rotates around its Y-axis. This is the natural motion for turning at an intersection or looking around a scenic viewpoint.
B. Direction Determination
The gyroscope reports rotation as a signed value. For Y-axis rotation:
- Positive values (y > 0): counterclockwise rotation — the user is turning left
- Negative values (y < 0): clockwise rotation — the user is turning right
This sign convention gives us a simple rule for mapping physical rotation to virtual navigation direction.
C. Noise Removal and Delay
The gyroscope faces the same noise challenges as the accelerometer. Minor hand tremors, slight phone adjustments, and sensor drift all produce rotation data that should not be interpreted as intentional turning.
We apply the same approach used for the pedometer:
- Sample averaging: Collect gyroscope readings in a ring buffer and compute running averages to smooth out transient noise
- Threshold comparison: Only trigger a turn event when the averaged rotation magnitude exceeds a configured threshold
- Delay logic: After detecting a turn, ignore subsequent rotation input for a set duration (one second) to prevent repeated triggering from a single deliberate rotation
The threshold and delay values differ from the pedometer settings — rotation gestures have different magnitude and timing characteristics than walking steps — but the algorithmic structure is identical.
D. The LotateDetector Implementation
Since Google’s simple-pedometer repository only covers accelerometer-based step detection, I created the rotation detector from scratch. The architecture mirrors SimpleStepDetector, adapted for gyroscope data and augmented with direction sensing.
Here is the full LotateDetector.java:
package com.example.myapplication;
import android.util.Log;
public class LotateDetector {
    private static final int ACCEL_RING_SIZE = 50;
    private static final int VEL_RING_SIZE = 10;
    // change this threshold according to your sensitivity preferences
    private static final float STEP_THRESHOLD = 80f;
    // 1 sec
    private static final int STEP_DELAY_NS = 1000000000;
    private int accelRingCounter = 0;
    private float[] accelRingX = new float[ACCEL_RING_SIZE];
    private float[] accelRingY = new float[ACCEL_RING_SIZE];
    private float[] accelRingZ = new float[ACCEL_RING_SIZE];
    private int velRingCounter = 0;
    private float[] velRing = new float[VEL_RING_SIZE];
    private long lastStepTimeNs = 0;
    private float oldVelocityEstimate = 0;
    private StepListener listener;
    public void registerListener(StepListener listener) {
        this.listener = listener;
    }

    public static final String TYPE_RIGHT = "right";
    public static final String TYPE_LEFT = "left";
    // 1 sec
    private static final int LOTATE_DELAY_NS = 1000000000;
    // fire lotate power
    private static final float LOTATE_POWER = 2.0f;
    private static final float LOTATE_POWER_OTHER = 3.0f;
    private String type = TYPE_LEFT;
    public void updateGyro(long timeNs, float x, float y, float z) {
        float[] currentAccel = new float[3];
        currentAccel[0] = x;
        currentAccel[1] = y;
        currentAccel[2] = z;
        accelRingCounter++;
        accelRingX[accelRingCounter % ACCEL_RING_SIZE] = currentAccel[0];
        accelRingY[accelRingCounter % ACCEL_RING_SIZE] = currentAccel[1];
        accelRingZ[accelRingCounter % ACCEL_RING_SIZE] = currentAccel[2];
        float[] worldZ = new float[3];
        worldZ[0] = SensorFilter.sum(accelRingX) / Math.min(accelRingCounter, ACCEL_RING_SIZE);
        worldZ[1] = SensorFilter.sum(accelRingY) / Math.min(accelRingCounter, ACCEL_RING_SIZE);
        worldZ[2] = SensorFilter.sum(accelRingZ) / Math.min(accelRingCounter, ACCEL_RING_SIZE);
        float normalization_factor = SensorFilter.norm(worldZ);
        worldZ[0] = worldZ[0] / normalization_factor;
        worldZ[1] = worldZ[1] / normalization_factor;
        worldZ[2] = worldZ[2] / normalization_factor;
        float currentZ = SensorFilter.dot(worldZ, currentAccel) - normalization_factor;
        velRingCounter++;
        velRing[velRingCounter % VEL_RING_SIZE] = currentZ;
        float velocityEstimate = SensorFilter.sum(velRing);
        float absVelocityEstimate = Math.abs(velocityEstimate);
        if (absVelocityEstimate > STEP_THRESHOLD && oldVelocityEstimate <= STEP_THRESHOLD
                && (timeNs - lastStepTimeNs > STEP_DELAY_NS)) {
            // check if lotate is right or left
            type = (y > 0) ? TYPE_LEFT : TYPE_RIGHT ;
            listener.lotate(timeNs, type);
            lastStepTimeNs = timeNs;
        }
        oldVelocityEstimate = velocityEstimate;
    }

}
A few details worth noting:
- The code uses
Math.abs(velocityEstimate)for the threshold comparison — unlike the pedometer which only checks for positive crossings, rotation can occur in either direction, so we need the absolute value. - The direction is determined by checking the sign of the Y-axis value (
y > 0means counterclockwise, i.e., turning left). - The
LOTATE_POWERandLOTATE_POWER_OTHERconstants provide configurable sensitivity for fine-tuning how responsive the rotation detection feels. - Continuous rotation in one direction produces repeated turn events (spaced by the delay), enabling the user to look around by holding a steady rotation — useful for surveying a 360-degree panoramic view.
When the rotation detector fires, it calls back to the Activity:
@Override
public void lotate(long timeNs, String type) {
    // call lotating street view

}
This callback is where we will connect the rotation event to the Street View camera — panning the panoramic view left or right.
Integrating the Gyroscope into the Activity
With the LotateDetector built, we need to register the gyroscope sensor alongside the accelerometer in SimplePedometerActivity.java. Here is the updated code:
@Override
protected void onCreate(Bundle savedInstanceState) {
  super.onCreate(savedInstanceState);
  textView = new TextView(this);
  textView.setTextSize(30);
  setContentView(textView);
  // Get an instance of the SensorManager
  sensorManager = (SensorManager) getSystemService(SENSOR_SERVICE);
  accel = sensorManager.getDefaultSensor(Sensor.TYPE_ACCELEROMETER);
  simpleStepDetector = new SimpleStepDetector();
  simpleStepDetector.registerListener(this);
  // Add gyro sensor
  gyro = sensorManager.getDefaultSensor(Sensor.TYPE_GYROSCOPE);
  simpleLotateDetector = new SimpleLotateDetector();
  simpleLotateDetector .registerListener(this);
}
@Override
public void onResume() {
  super.onResume();
  numSteps = 0;
  textView.setText(TEXT_NUM_STEPS + numSteps);
  sensorManager.registerListener(this, accel, SensorManager.SENSOR_DELAY_FASTEST);
  // register gyro
  sensorManager.registerListener(this, gyro, SensorManager.SENSOR_DELAY_FASTEST);
}
@Override
public void onSensorChanged(SensorEvent event) {
  if (event.sensor.getType() == Sensor.TYPE_ACCELEROMETER) {
    simpleStepDetector.updateAccel(
        event.timestamp, event.values[0], event.values[1], event.values[2]);
  }
  if (event.sensor.getType() == Sensor.TYPE_GYROSCOPE) {
    simpleLotateDetector.updateGyro(
        event.timestamp, event.values[0], event.values[1], event.values[2]);
  }

}
The onSensorChanged callback now handles both sensor types, routing accelerometer events to the step detector and gyroscope events to the rotation detector. Both sensors are registered with SENSOR_DELAY_FASTEST to ensure responsive detection.
Connecting to Google Street View
With walking and turning detection complete, the next step is linking these physical movements to navigation within Google Street View. This is what transforms raw sensor data into a sightseeing experience.
A. Enabling the Maps SDK for Android
Before using Street View programmatically, you need to enable the Maps SDK for Android API in the Google Cloud Console. This provides the API key required to load Street View panoramas in your application.
The API key setup follows the standard process documented in the android-samples repository:
- Obtain an API key from the Google Cloud Console
- Create a file called
secure.propertiesin your project directory (this file should not be under version control) - Add a single line:
MAPS_API_KEY=YOUR_API_KEY - Build and run
B. Initializing Street View
The Street View initialization code comes from Google’s StreetViewPanoramaNavigationDemoActivity sample:
@Override
protected void onCreate(final Bundle savedInstanceState) {
    super.onCreate(savedInstanceState);
    setContentView(R.layout.street_view_panorama_navigation_demo);
    SupportStreetViewPanoramaFragment streetViewPanoramaFragment =
            (SupportStreetViewPanoramaFragment)
                    getSupportFragmentManager().findFragmentById(R.id.streetviewpanorama);
    streetViewPanoramaFragment.getStreetViewPanoramaAsync(
            new OnStreetViewPanoramaReadyCallback() {
                @Override
                public void onStreetViewPanoramaReady(StreetViewPanorama panorama) {
                    mStreetViewPanorama = panorama;
                    // Only set the panorama to SYDNEY on startup (when no panoramas have been
                    // loaded which is when the savedInstanceState is null).
                    if (savedInstanceState == null) {
                        mStreetViewPanorama.setPosition(SYDNEY);
                    }
                }
            });
   mCustomDurationBar = (SeekBar) findViewById(R.id.duration_bar);

}
This loads a Street View panorama fragment and initializes it at a starting position (Sydney in the sample, but you can set any coordinates). The mStreetViewPanorama object becomes our handle for all subsequent navigation.
C. Going Straight Along the Arrows
If you have used Google Street View, you know that navigation arrows indicate available directions of travel. To move forward, we need to find the arrow closest to the direction the camera is currently facing and advance to it:
public void onMovePosition(View view) {
    StreetViewPanoramaLocation location = mStreetViewPanorama.getLocation();
    StreetViewPanoramaCamera camera = mStreetViewPanorama.getPanoramaCamera();
    if (location != null && location.links != null) {
        StreetViewPanoramaLink link = findClosestLinkToBearing(location.links, camera.bearing);
        mStreetViewPanorama.setPosition(link.panoId);
    }

}
The findClosestLinkToBearing method compares the camera’s current bearing (the compass direction it is facing) against all available navigation links at the current location. It selects the link whose bearing is closest to the camera direction. This means when the pedometer detects a step, calling onMovePosition moves the user forward along the road they are currently facing — exactly like walking down a street.
D. Turning Left and Right
When Street View presents a fork in the road or the user wants to change direction, they need to pan the camera. The rotation detected by the gyroscope is translated into bearing adjustments:
 public void onPanLeft(View view) {
    if (!checkReady()) {
        return;
    }
    mStreetViewPanorama.animateTo(
            new StreetViewPanoramaCamera.Builder().zoom(
                    mStreetViewPanorama.getPanoramaCamera().zoom)
                    .tilt(mStreetViewPanorama.getPanoramaCamera().tilt)
                    .bearing(mStreetViewPanorama.getPanoramaCamera().bearing - PAN_BY_DEG)
                    .build(), getDuration());

}
public void onPanRight(View view) {
    if (!checkReady()) {
        return;
    }
    mStreetViewPanorama.animateTo(
            new StreetViewPanoramaCamera.Builder().zoom(
                    mStreetViewPanorama.getPanoramaCamera().zoom)
                    .tilt(mStreetViewPanorama.getPanoramaCamera().tilt)
                    .bearing(mStreetViewPanorama.getPanoramaCamera().bearing + PAN_BY_DEG)
                    .build(), getDuration());

}
The logic is straightforward:
- Pan left: subtract
PAN_BY_DEGfrom the current bearing - Pan right: add
PAN_BY_DEGto the current bearing
The animateTo method creates a smooth camera transition rather than an abrupt jump, which makes the visual experience feel more natural. The zoom and tilt are preserved — only the bearing changes.
When the gyroscope detects a left rotation, onPanLeft is called. When it detects a right rotation, onPanRight is called. Since the rotation detector fires repeatedly during sustained rotation (with a one-second delay between events), the user can look around a full 360 degrees by continuing to rotate their phone — useful for surveying a scenic location or choosing which road to take at an intersection.
After turning to face a new direction, the user can resume walking. The next detected step will advance them along whichever navigation arrow is closest to the new bearing.
E. Landscape Screen Orientation
Since the app is designed to be cast to a TV, the screen orientation must be fixed to landscape. A portrait-mode smartphone screen cast onto a widescreen TV would produce large black bars on the sides, wasting most of the display area.
This is configured in AndroidManifest.xml:
<activity
   android:name=".MainActivity"
   android:label="maps"
   android:screenOrientation="landscape">
   <intent-filter>
       <action android:name="android.intent.action.MAIN" />
       <category android:name="android.intent.category.LAUNCHER" />
   </intent-filter>

</activity>
Setting android:screenOrientation="landscape" ensures that the Street View panorama fills the TV screen properly when cast via Chromecast.
Casting to TV with Chromecast
With the sensor detection and Street View integration complete, the final piece is getting the experience onto the TV screen. This is handled by Google Chromecast and the Google Home app.
The process is simple:
- Ensure the smartphone and Chromecast are on the same Wi-Fi network
- Open the Google Home app and initiate screen casting to the Chromecast device
- Launch the virtual sightseeing app — the smartphone screen (now showing Street View in landscape mode) mirrors to the TV
No additional code is required for the casting itself — Chromecast’s screen mirroring handles the video stream transparently. The latency is low enough that the connection between physical stepping and on-screen movement feels responsive and immediate.
The Demo: Virtual Sightseeing in Action
With everything in place, here is the complete experience:
Step 1: Cast your smartphone screen to the TV using Google Home and Chromecast.
Step 2: Launch the app. The Street View panorama appears on both the phone and the TV.
Step 3: Hold the smartphone or place it in your pocket. Begin walking in place using the recommended technique — raise your thighs slowly and high, swing your arms with fingers extended.
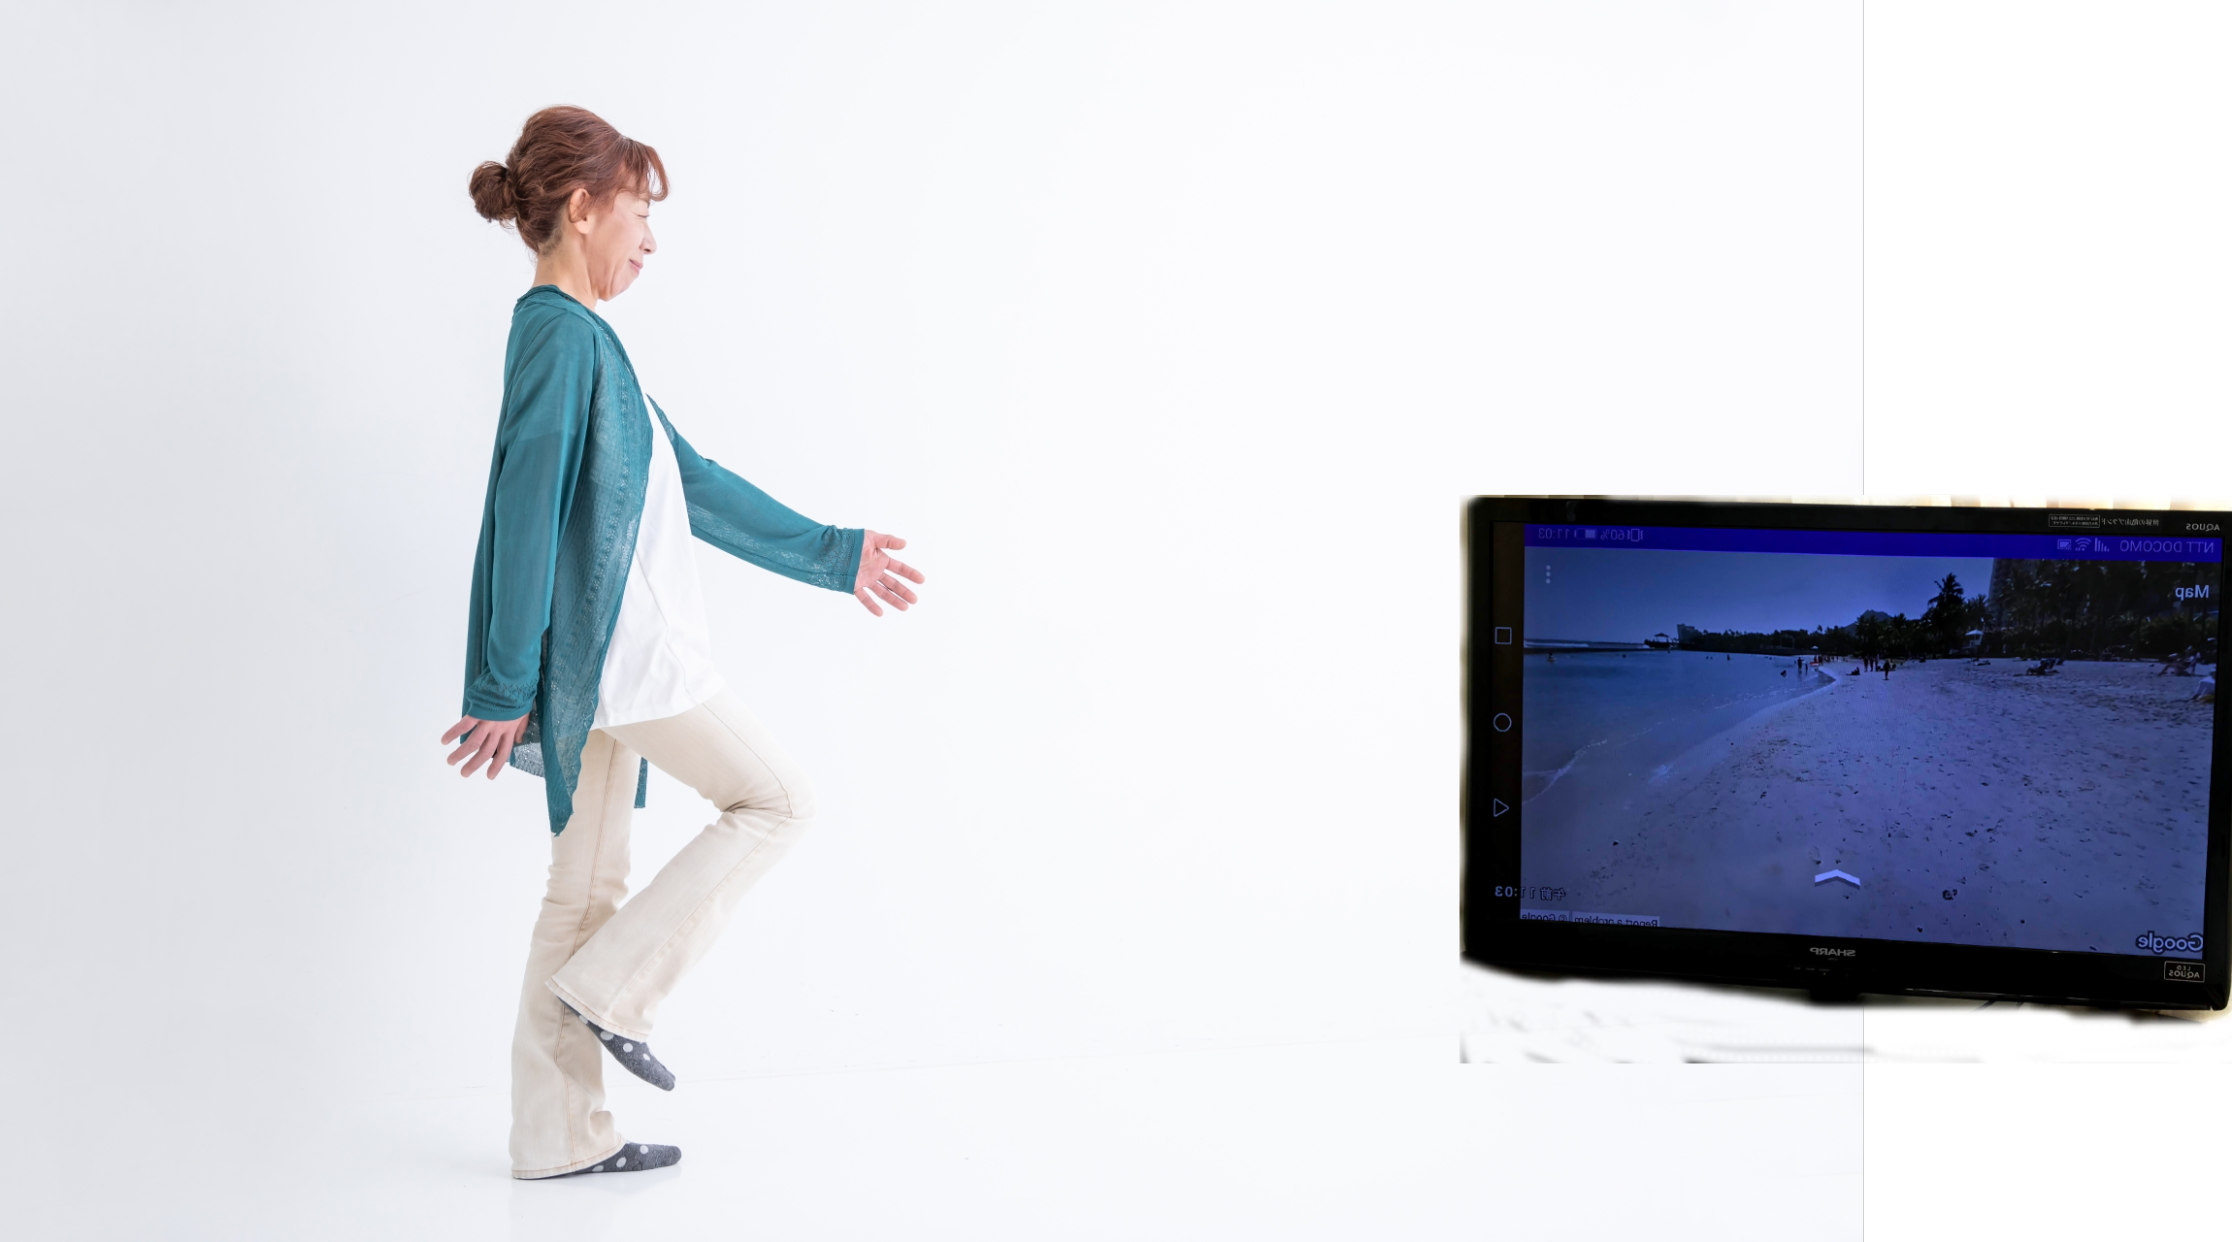
Step 4: As the smartphone detects your walking motion, the Street View on the TV advances forward along the road.

Step 5: To turn, stop walking and rotate your smartphone around its vertical axis. Turn counterclockwise to look left, clockwise to look right.
Step 6: The TV panorama pans in sync with your rotation. Keep rotating to survey your surroundings. Once you are facing the direction you want to go, resume walking to move forward.
The result is a surprisingly immersive experience. The physical act of walking — feeling your muscles engage, your heart rate increase — combined with the visual feedback of moving through real-world streets creates a genuine sense of exploration. You find yourself making choices at intersections, pausing to take in a view, and wondering what is around the next corner.
Reflections and Lessons Learned
This project reinforced several important principles:
Sensor data is noisy by nature. The gap between raw sensor output and meaningful motion detection is substantial. Without careful filtering, averaging, and threshold tuning, the accelerometer and gyroscope data would be unusable. The choice of noise removal strategy — sample averaging with threshold comparison rather than a low-pass filter — proved well-suited for detecting deliberate, exercise-level movement while ignoring incidental vibrations.
Simple ideas can require non-trivial engineering. The concept of “walk in place to move through Street View” sounds straightforward. The implementation requires understanding MEMS sensor physics, signal processing, Android sensor lifecycle management, Street View API navigation semantics, and screen orientation constraints. Each layer is individually manageable, but the integration of all layers demands attention to detail.
Physical computing creates engaging experiences. There is something fundamentally different about interacting with software through your body rather than through taps and swipes. The combination of real physical exercise with virtual exploration addresses two genuine needs simultaneously — and the visceral feedback loop between stepping and seeing the view change keeps the experience engaging in a way that purely screen-based interaction does not.
This project was built during a time when the world needed creative solutions for staying active and connected to the wider world from home. The technology is straightforward — off-the-shelf smartphone sensors, a well-documented API, and a commodity casting device — but the combination addresses a real human need. Sometimes the most satisfying engineering is not about building the most sophisticated system, but about connecting existing capabilities in a way that genuinely improves someone’s day.
Virtual Sightseeing Series:
- Part 1: Walking at Home as Virtual Sightseeing — Concept and Step Detection
- Part 2: Gyroscope Navigation, Street View Integration, and the Final Demo (You are here)